Appearance
Workspace overview
Qubu Studio is organized into five user-facing areas.
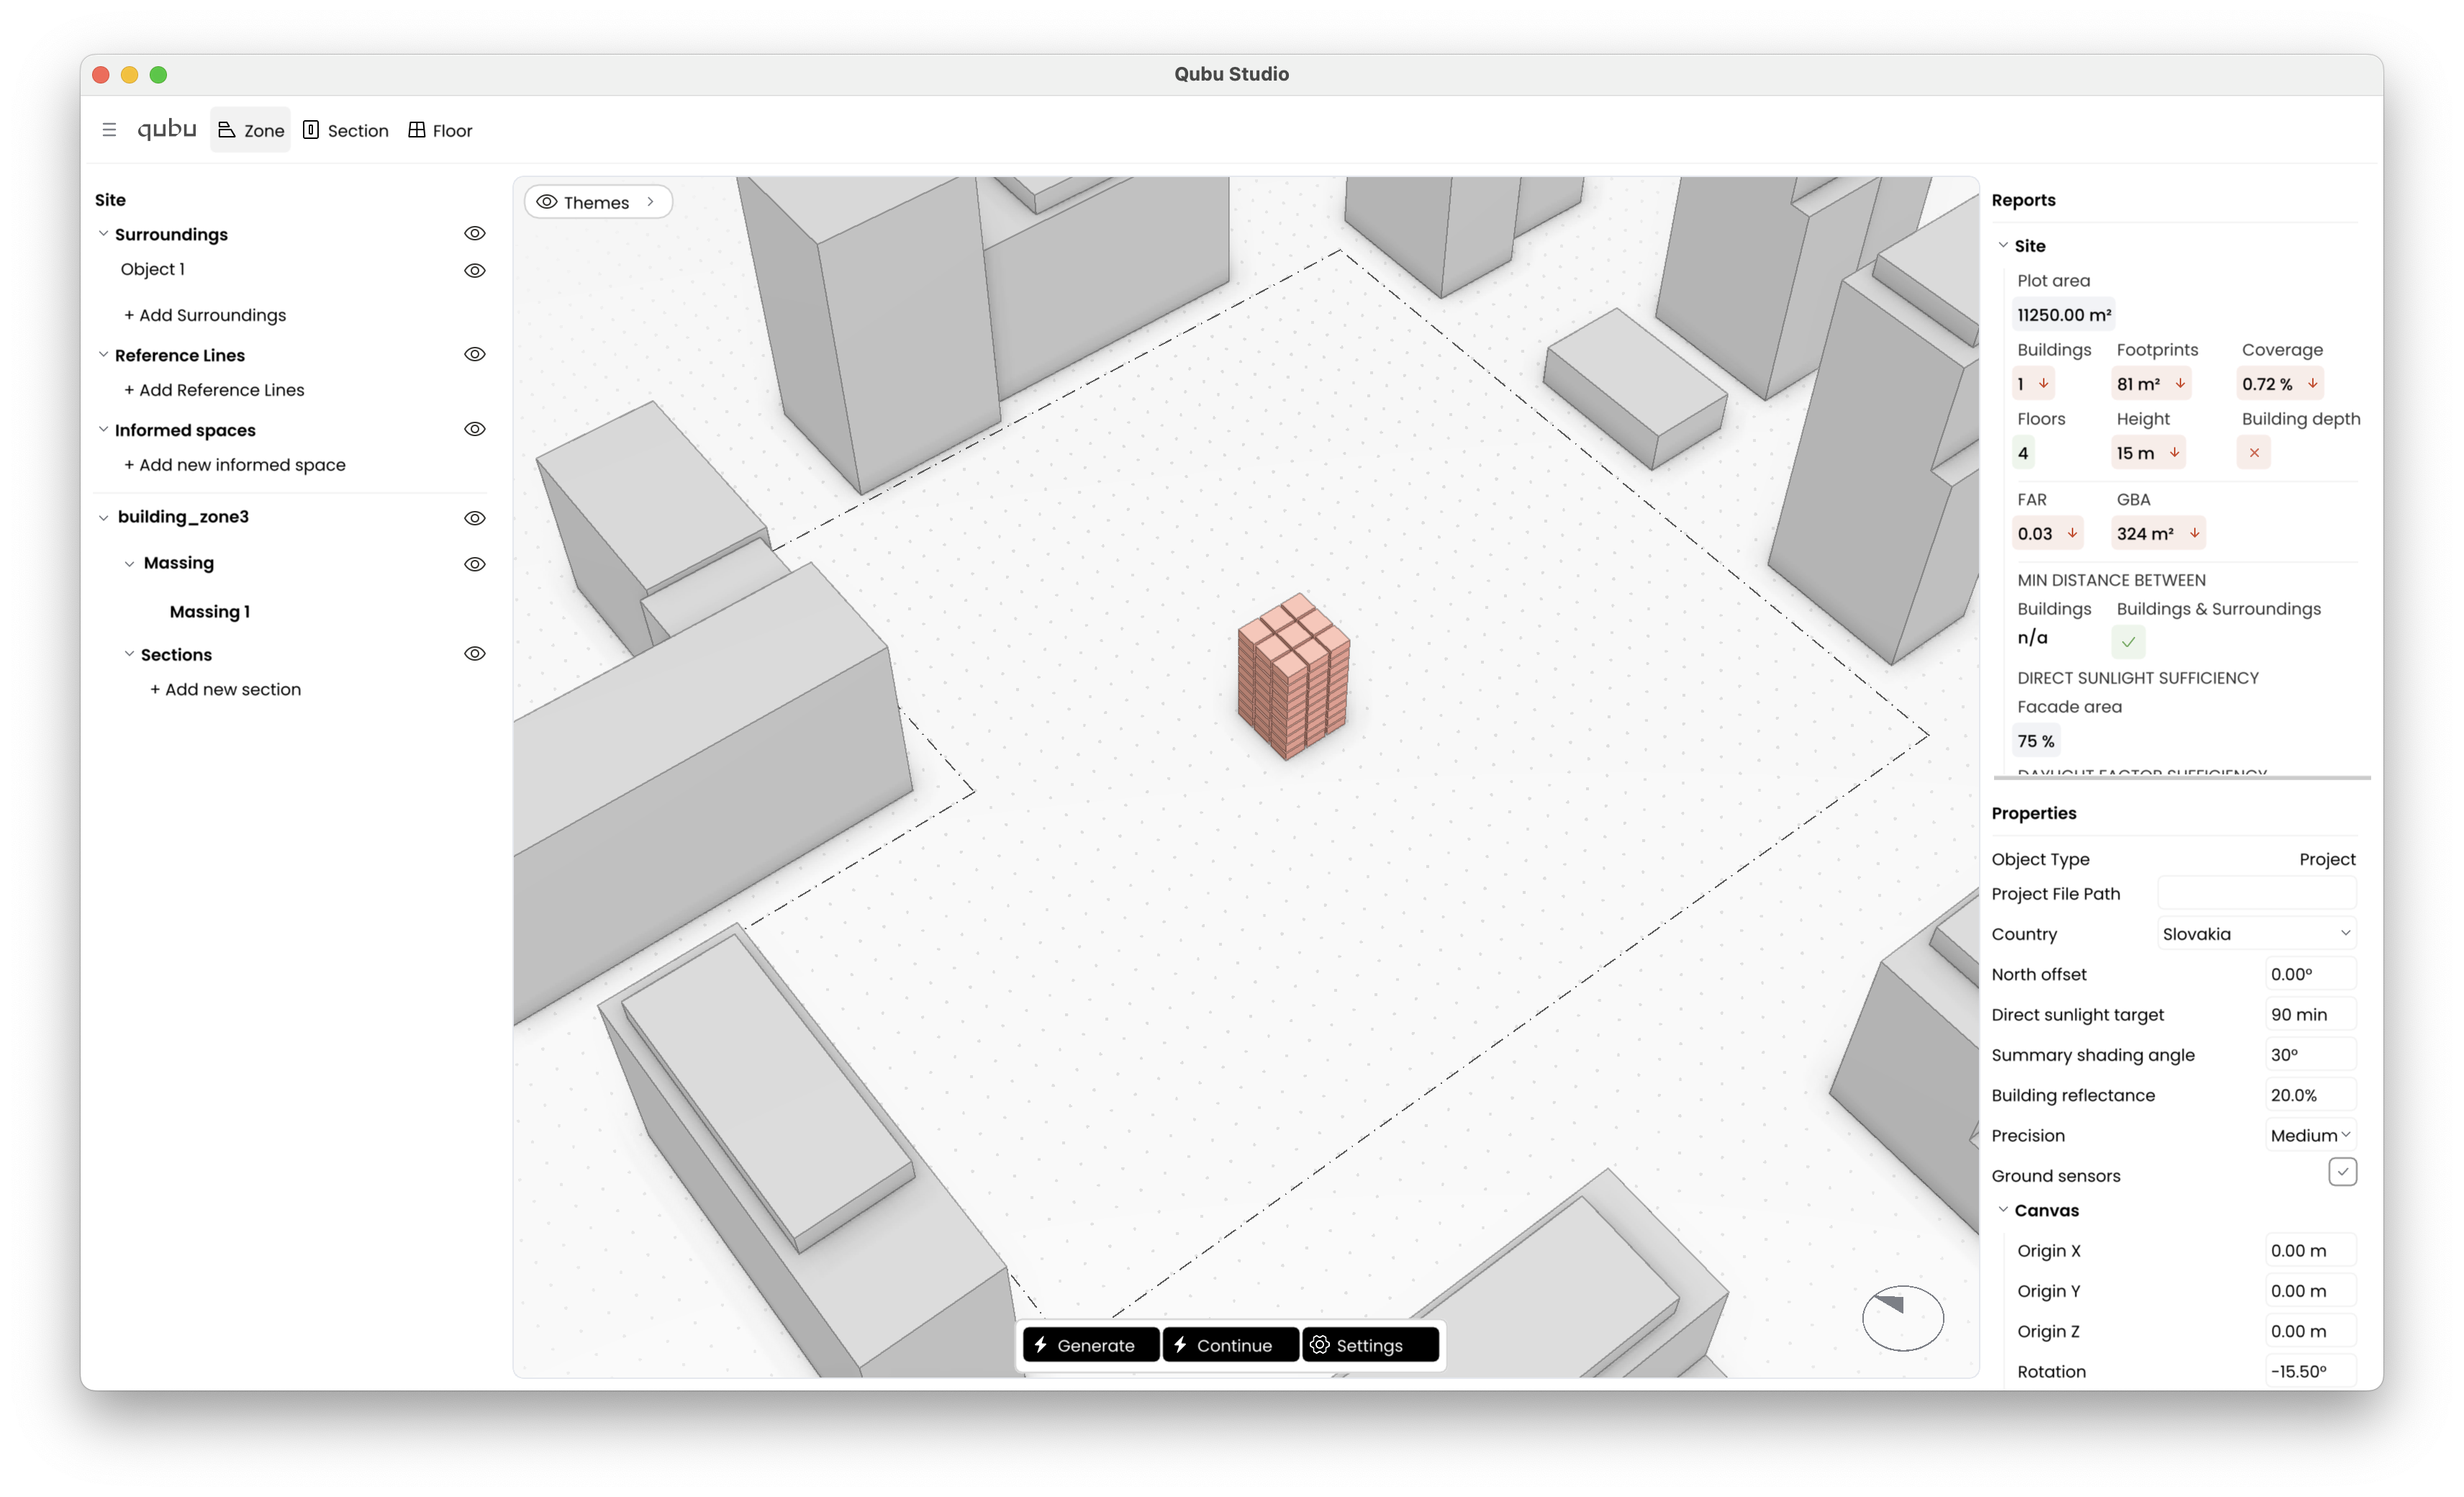
Header
The header contains:
- the main menu,
- stage buttons: Zone, Section, Floor,
- and quick camera actions such as Fit View and Top Camera through the main menu.
The main menu gives access to project actions, import, export, help, feedback, logs, and logout.
Left panel: project tree
The left panel is the project tree. It lists the current site content and lets you select, rename, expand, and toggle visibility for items.
Main groups:
- Surroundings
- Informed spaces
- Boundary
- Massing under the boundary
- Sections under the boundary
Center: viewport
The center of the workspace is the 3D viewport.
Use it to:
- inspect the site,
- orbit, pan, and zoom,
- review daylight themes,
- and move selected geometry with the gizmo.
Right panel: reports and properties
The right side is split vertically:
- Reports on top,
- Properties on bottom.
Reports explain what the current generation produced. Properties explain or edit the selected item or the project itself.
Floating tools
Two floating tools matter in normal use:
- Generative Algorithm Settings in the center/top area,
- Themes near the upper-left of the viewport.
The compass is drawn near the bottom-right of the viewport and is the visual reference for North offset.